"Stringing your car" - Alignment
Building your engine and making horsepower is only one aspect of going fast. Regardless if your vehicle is a daily driver, weekend race car - drag racing, road racing or autocross, it is vital not only to your car's performance and handling but to the longevity and life of your tires, to have your alignment set correctly.
Most people take their vehicle to a local shop to have the vehicle properly aligned after an accident or having new tires or suspension installed. This will generally cost about $60-80USD per alignment. For the weekend racer or dedicated club/amateur/pro racer, this fee can add up substantially when you need to make suspension changes at every track and weather condition.
There are several DIY alignment methods available for the average consumer, however the "string" alignment method we will describe to you here is the easiest, simplest and most cost effective and repetitive method to set your camber and toe.
Before we get started, when talking about setting ones alignment, we are generally speaking of setting the toe and camber on the front and rear wheels. On Honda's, you can easily set the front and rear toe, however front and rear camber requires aftermarket components that give the ability to make camber changes.
One side note however, most people are concerned about tire wear and even tirewear after upgrading suspension components or lowering their vehicle. Tirewear is most dramatically affected from incorrect toe, not the common myth of camber as the culprit. Because of this, if you are concerned about tire wear and do not have adjustable camber components, simply follow the toe adjustment portion of this article.
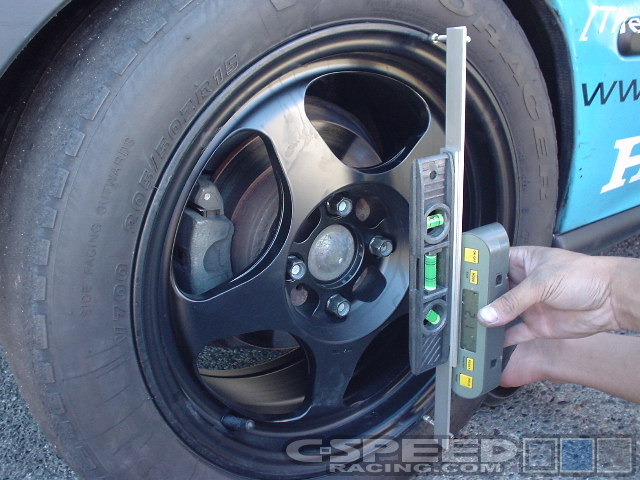
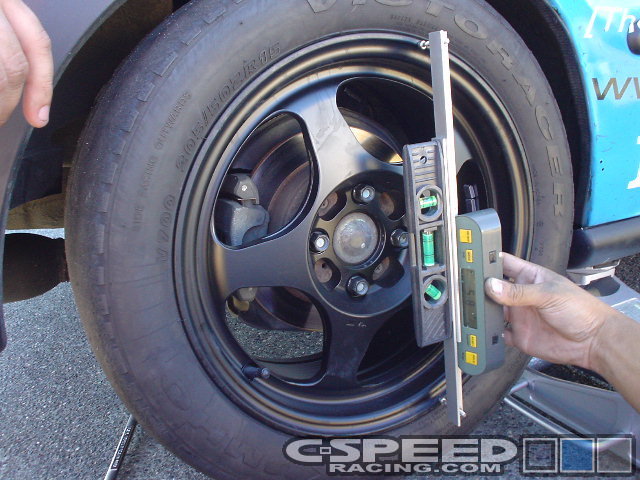
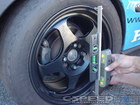
For those that do have camber adjustment components installed, you cannot set your camber correctly without some means to measure your existing camber accurately. There are several tools on the market that you can purchase for around $140US that will clamp onto your wheel, however we will show you how to make your own for under $50USD.
|
 |
 |
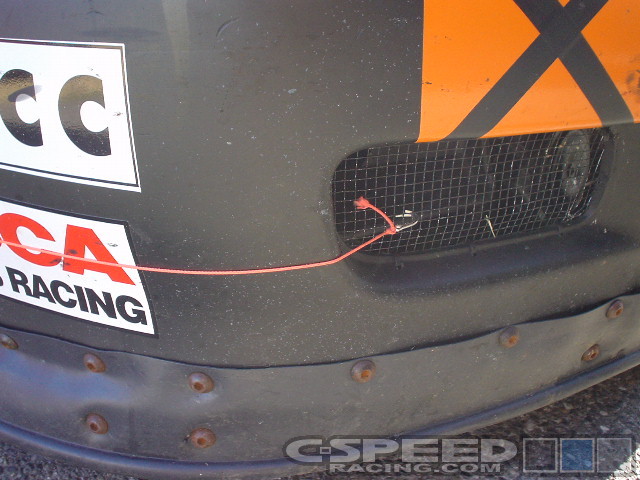
The first thing you want to do is "string" the car. This is done by taking some string and running it around the vehicle starting from the driver front around the back and to the passenger front. Use a nail or paperclip to fashion a hook on the ends of the string to attach the string to the front bumper cover. Cut the string in half on the rear bumper portion and tie in a 12" piece of bungee cord so the entire length of string is stretchable. |
 |
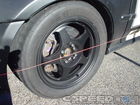 |
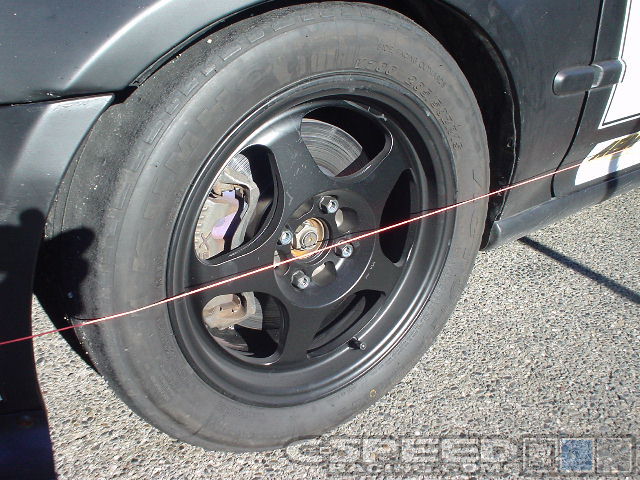
How that the string is in place, make sure to center the string on each wheel so that it crosses the middle of the wheel vertically. It is not absolutely essential to get it precisely in the middle, but close. |
 |
 |
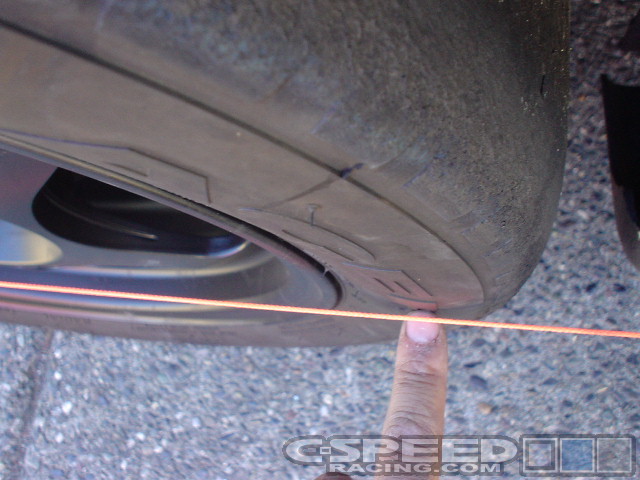
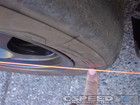
Once the string is properly positioned, you will notice that the string should be touching the front or rear (or both) part of each wheel. This tells you whether each wheel is toe'd in or out or has zero toe. Zero toe means that the wheel is pointed directly straight ahead parallel with the centerline of the vehicle. The string in this case would be touching the front and rear part of the wheel. If the wheel has any toe, than the string will be touching only the front or only the rear part of the wheel as shown in the picture. |
 |
 |
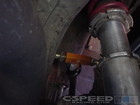
Before making any toe adjustments, you will want to set your camber first. Always set camber/caster/ride height before setting the toe as toe is always affected from any changes made to the above. As you can see here, we've made our own camber gauge. Take a measurement of the current camber with the car on level ground and front wheels pointed straight. Take note of the camber, then jack the car up with the wheels off the ground and take another measurement. |
 |
 |
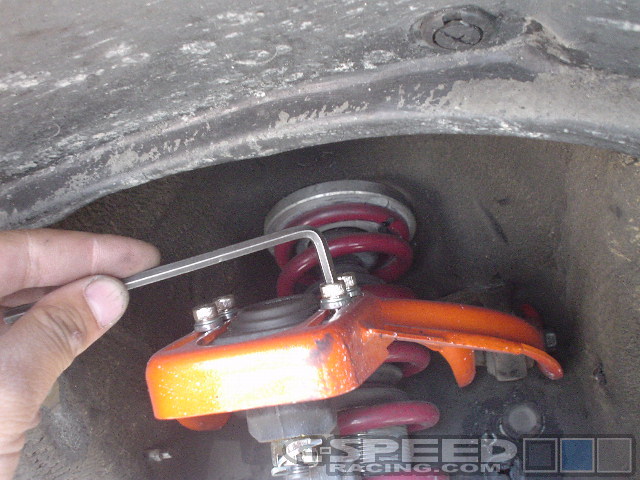
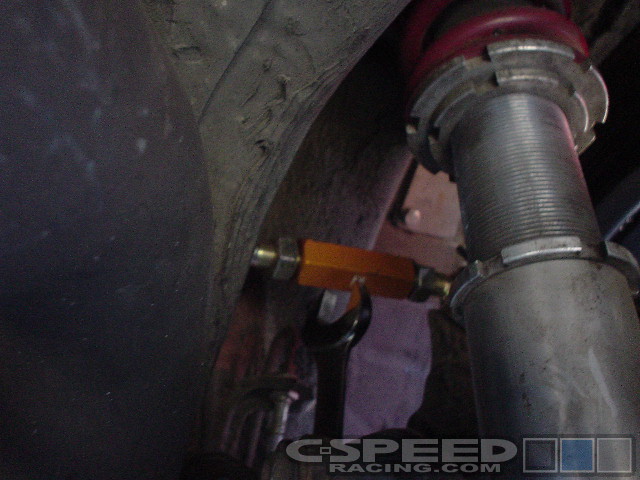
With the wheels off the ground, make your camber changes using your aftermarket components. If you needed to add 1.5 degrees (from the first measurement), then adjust the camber accordingly using the second measurement by adding 1.5 degrees to the second measurement. Once done, lower the car, roll the vehicle forward and backwards a few times to settle the suspension and remeasure. |
 |
 |
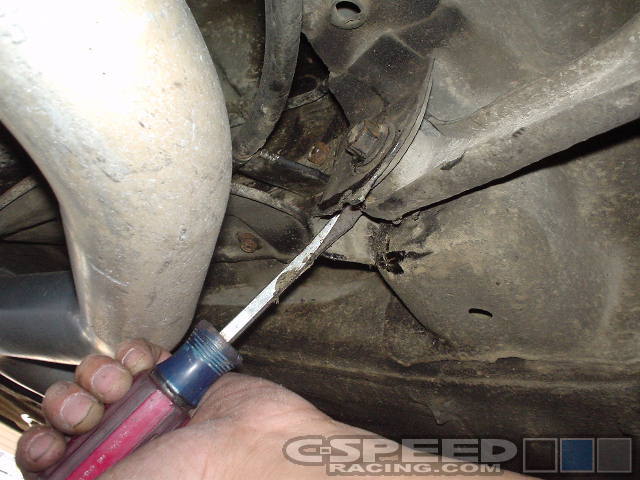
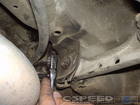
Now that the camber is set, you can move on to toe. In our race application, we run about 1/8" toe in on the rear. 1/8" is approximately one string width. On most street applications, you will want to run zero toe. To adjust the toe, loosen the 14mm bolt on the lower trailing arm and use a large screwdriver to pry the arm. Outwards for more toe out, inwards for more toe in. Make a small change, tighten the bolt, roll the car forwards and backwards and restring the car to verify your changes. It may take several tries to get it right. |
| |
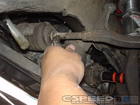 |
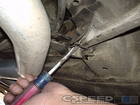
On the front, in our race application we generally run 1/8" toe out. This is applicable on the street as well. With the front wheels pointed straight, check the string and make your changes accordingly. On the steering rack you can adjust the tie rod by loosening the 19mm lock nut and then turn the rod using a 14mm wrench. Turning the rod clockwise or counter-clockwise will either lengthen (toe in) or shorten (toe out) the overall length of the tie rod. Make a small change, roll the car forwards and backwards a few times and restring the car. Be patient, this will take several tries to get it right as well. Congratulations! You've just set your alignment on your own. |
|